Showing posts with label Creston Card and Stationery. Show all posts

Sunday, July 7, 2019

Painting with Dyes for Cards


Textile Card by Eileen Gidman


My personal favorite, of this set of 25 cards that were just recently completed, is this goose in the purple and gold. I really love the purplish tingle to the back.

Textile Card Making

At a meeting this morning, I was asked about the steps required in making the card tops. I was surprised myself how many steps there are. Painting the fabric with thickened dyes is the most time consuming but so much fun. Here are the steps to making the cards:

  1. Paint images with thickened dyes onto cotton, linen, velvet and silk fabrics.
  2. Cure and wash.
  3. Iron on 4 1/2" X 6 1/2" heavy interfacing to the back of each proposed card top.
  4. Cut out leaving an additional 1/4" all around for fringing.
  5. Fringe. (I was fringing them outside yesterday when a big gust of wind came. I was chasing card tops all over the neighbourhood, ha, ha!)
  6. Fold card stock in half. 
  7. Glue textile piece onto card top and lay under weight to dry.
  8. Sign card in case the buyer wishes to place the card in a 5 X 7" frame.
  9. Add a back label that tells what it is made with, the artist (Eileen Gidman) and a red maple leaf to signify it is Canadian made.
  10. Package in clear display bag.
  11. Label that it is original and frameable art.
  12. Add price stickers. 


Textile Card by Eileen Gidman
I left the last 1" or so of thread loose on the fisherman's line. I wanted to put a cap on the figure, but when you are free motion stitching so small, there is little opportunity for maneuvering so it looks more like a straw hat. I kind of like how it turned out though.

Textile Card by Eileen Gidman
How did I get such vividness with this purple? All I can say is perhaps using freshly made up dyes and going over the plum in successive layers. I like adding a little mauve to the leaves to suggest the reflective light on the leaves.
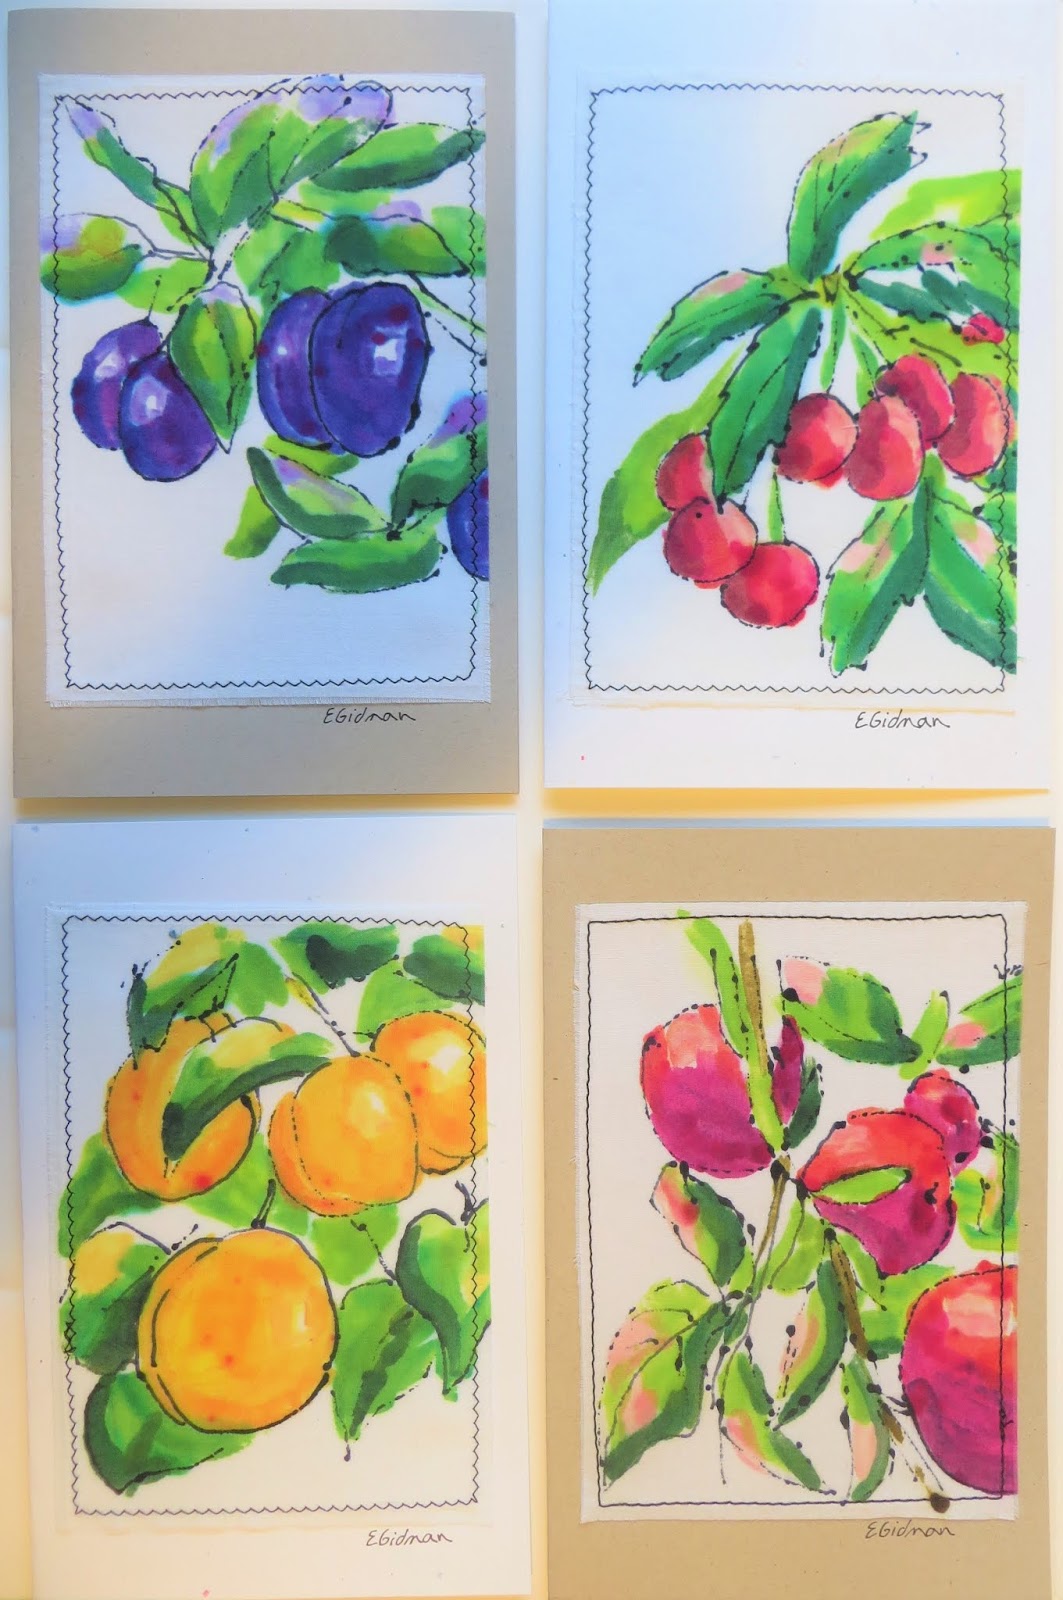
Textile Card by Eileen Gidman
 Fruits of the Creston Valley. Most recently we've been enjoying strawberries and raspberries. Cherries are starting.

Textile Card by Eileen Gidman
Some of the new cards available for sale at Creston Card and Stationery . None of these cards have the hand dyed velvet embellishments like the last set of textile cards I created this spring. These cards are unique with more detail in the painted image. There is still additional black thread sketching adorning them.

Textile Card by Eileen Gidman
More of the new cards available for sale at Creston Card and Stationery .


Thursday, December 24, 2015

Sewing Just Before Christmas

"Merry Christmas Everyone!"
Are you busy in your studio before Christmas? I hope you have been, as I have been having so much fun there. The days have quieted down with the arrival of snow and I find myself, wanting to sew and sew some more. Below is one of my hand 'dye' painted textile cards with 'free motion' thread sketching. For my own Christmas cards I simply had photos made of the textile art and attached the photo to folded card stock.
 
I think the trick in thread sketching is to simplify. "What lines really tell the story?" In this case, I felt, that the shape of an old fashioned wooden shoeshoe was important, as well as the webbing. Notice I didn't put the webbing in the top area, or the boot harnesses, or ski poles. Did you make your own Christmas cards?


Sewing Gifts

Picking fun fabric and fussy cutting makes for some great potholders for gifts.

Potholders:

Okay measure twice and cut once. Obviously I didn't do that here!
 
Coordinating fabric makes two matching potholders but not they are not the same.

Lay the two layers of fabric right sides together. Mine were 8" square. Lay two layers of cotton batting on top. I stitched with a 3/8" seam to be sure to catch all layers. It probably would have been better to change to a walking foot but with attention, a regular foot works.

Preparing a Loop
 Some I added a loop to. Out of the scraps, I cut 1 1/2" strips, folded in the edges and stitched down the open side. The sewn strips were cut to 4" and inserted between the two fabric layers when sewing the perimeter.


A matched set because of the identical paisley background.
Leaving an opening when sewing the perimeter allows the potholder to be turned right side out. The opening was hand stitched closed and then the square was machine quilted.
 
This lovely fabric was purchased at http://crestoncard.com/
All packaged and ready for giving

From the left over scraps I cut 3/8" strips, sewed them together to form strips long enough to tie the two potholders together.

Board Game Bag:

My Scrabble Tiles Bag

 Although this top sample was sewn years ago, I wanted to show it, as the bag has been great. Three features I really like are:
  1. the satiny lining as the tiles slip out easily
  2. the double draw string as it is easy to close
  3. the front pieces is velvet so it absorbs some of the sound as you lay down the bag.
As this bag is a gift for another Scrabble Player, I wanted to incorporate those special features. I didn't take photos as I went along, but this is what I did. I put two layers of cotton together and free motion stitched them together. I used one of my hand dyed fabrics for the outside. To see what was my inspiration for this fabric, click here.
 
 I cut a rectangle from the two sewn layers of fabric, folded it in half lengthwise and sewed up the two sides. Then I sewed a 2" seam across the bottom side seam to create shape to the bottom of the bag. The bag was then turned right side out. Next a lining was sewn using a shiny fabric but I made it a bit longer. The lining was inserted into the outer bag and turned over the top edge of the outer bag to create a casing for the drawstring.
 
After sewing the edge down all around the top, I stitched around the side seam several times in a square shape. After that the stitches of the side seam were undone to create an opening for the string to go into the casing. Strings were threaded through the casing all the way around the bag and back to the original opening. This was then done on the other side with another string. Beads were added.


To keep the lining and outer bag from separating, a few hand stitches were sewn to catch them together at the bottom near the side seam.
There it is. Of course this would make a unique bag for other board game pieces.
January is around the corner and I am looking forward to more time in the studio. What are you planning?

Friday, July 24, 2015

Projects in an Artist's Studio

Mixed media artist and Blogger Win Dinn asked readers to post a link to show what was going on in their studios. Photographing for this blog post made me realize how many projects an artist may have going on at once. For this post, I didn't include what was happening in the office regarding the selling of art. I know I spent sometime in the office yesterday printing off labels for cards and fabric packaging, as well as researching 'Made in Canada' labels, and ordering a maple leaf stamp through Creston Card and Stationery.
Check out what's happening in my studio below.

Developing a new card design. Hand painted textile bookmarks. I am trying out a removable glue for attaching them to a card. So far so good. (this is the only thing I moved in my studio for this photo shoot as I had just placed these on a shelf the day before)
Bookmark backing pieces left over from the 50 bookmarks already made.

Ironing interfacing onto my hand (dye) painted fabric for textile cards.

Sewing details on the card tops.

Threads from fraying the edges of the cards and bookmarks. What a tedious job!

Folding card stock for the textile cards.
  
Gluing the textile card fronts to the folded cardstock.

Weighting the cards down for the glue to dry

I couldn't resist showing you my favorite card from this group. As a matter of fact my husband liked it so much he removed it from the stack headed for sale at Creston Card and Stationery.

And my favorite 'Art' dog. If you look closely at the photo, with the sewing machine in it, you will see her treat jar in the background. I think the cool floor as much as the treat jar is what is keeping her happy in the studio.
 
A sewing project from a family member to make two scarves out of this one large one, one for her and one for me.

I dug this book out when I grabbed books for weighting the cards. I need to review bird anatomy for a community project I am involved in, teaching a group to paint birds in watercolour.

Fabric from my recent Indigo dyeing that is waiting for to me to price.

Hand painted sky and designed material waiting to be trimmed, pressed and priced. I am working towards two Quilt shows where I will be a vendor. One in Nelson, BC and one in Canmore, AB in Oct. I have to be organized ahead because the highlight of my year, art wise is coming up in Sept, well actually all of Sept and I am going to be busy painting in watercolour. I look forward to telling you all about it. It's going to be fabulous.
 
Well there you have an example of one person's studio. Feel free to send me a photo or an email about what you have going on. egidman@kootenay.com

Saturday, June 27, 2015

Intuitive Hand Stitching on Hand Painted Fabric

Free Form Hand Stitching

Have you hand embroidered in the past? This past week I have had to slow down and spend time just sitting so I tried adding some free form hand stitching to my dye painted textile cards. On Pinterest, I have been noticing a looser style of stitchery which is often added to vintage fabrics. Here are my first attempts at this more intuitive style of hand stitching. If you are going to try it, I should warn you it's quite addicting!
 
The looseness of this sponge painted flower seems to disguise my stitches on the flower itself. Do you like the two coloured border? 
 
A pillow slip I stitched, likely in the '80s, with cross stitch embroidery using a stamped pattern.

Free form cross stitch in the border. Yes I know all the Xs aren't even, like in the above sample, but somehow I like the look.

I cut up a larger panel to that didn't have a strong enough image to be sellable into 3 textile card sizes. Can you see this is a hanging basket in front of a window? I only ask as my husband didn't really care for this one.
Creating distance in scenery.
My Textile Cards are now available in a new location at the Faeries Landing on the east side of Kootenay Lake, BC. This is Cherie, the owner who has wonderfully put this Art Market and Bistro together. Stop in to see the  Faeries Landing Art Market and Bistro as you cross the lake from Kootenay Bay.

Driving through Creston, BC? Be sure to stop at Creston Card and Stationery where you will find lots of art supplies, local artist's cards including my own, and now fabric too!

Friday, March 20, 2015

Bird and Wildlife Stitched on Fabric

Wow, some of these were a bit challenging to stitch. Fortunately the herons were easy as having stitched them several times, I know their shape fairly well. The Canada goose required some additional shading to aid in identifying it's species. The moose, well I just love it and I hope you do to. These textile cards are for sale at Creston Card and Stationery http://crestoncard.com/ in Creston, BC but I can also create you something similar if you are interested. Just send me an email to egidman@kootenay.com
 
Definitely I am going to be painting some fabric with chickens in mind as I look forward to stitching a few 'chicken' poses. The fox is very different being stitched over a colourful place in the fabric but when I was thinking I would like to try stitching another fox, I saw this fabric and said to myself 'Why not give this a try." What do you think?

'Canada Goose'

'Blue Heron'

'Blue Heron Strutting'

'A Big Chicken'


'My Moose'

'Colourful Fox'

'Red Silos' - not birds or wildlife but it seemed to 'kinda' fit with this grouping.
 
Today is the first day of spring and I will have some spring flowers painted on textile to show you very soon. 

Oh, I almost forgot to mention the 'It's Time for Colour' Quilt show came to Creston this week. You can read about the national project here. http://cqacanadianquilting.blogspot.ca/p/blog-page.html  What a delight to see the some of the  quilts from across Canada come to our town thanks to the Canadian Quilt Association.

Monday, December 1, 2014

December. A month for Christmas Cards

Lots of card making this time of year. Do you make cards? How do you go about it? Below is a sample of how I go about my textile 'winter' cards.
Just a suggestion of a hill of snow and a tree outlined in the front with stitching competes this one. Simplicity can seem sophisticated don't you think?
 

Here is one of two panels of card tops I painted with dyes one day. Not all of them will be satisfactory to make into cards so I will use a view finder to make my selections.

Using a view finder to find a composition I like.

The vertical cards sell better, so I opt for this one.

Log  cabin in the woods - a personal favorite.

A horizon line and a few stitched weeds in the front lead the viewer's eye up the creek, well at least that was my intention.

Geese heading south. These were a first for me and a bit of a pain as the thread had to be broken at each bird but I think it was worth it.
 
'Skaters on Duck Lake'. Thank you to the locals who were sharing photos a week or so ago of skating on a nearby lake. I look forward to stitching more skating figures.
If you are in Creston, BC you can see a selection of these cards for sale at Creston Card and Stationery. Happy December!