Showing posts with label Painting with Dyes. Show all posts

Friday, February 4, 2022

One of the Biggest Failures in Fabric Painting I ever had, was this Week

Along with a disappointing fabric painting failure (end of the post), there were some wonderful successes in fabric painting this week.


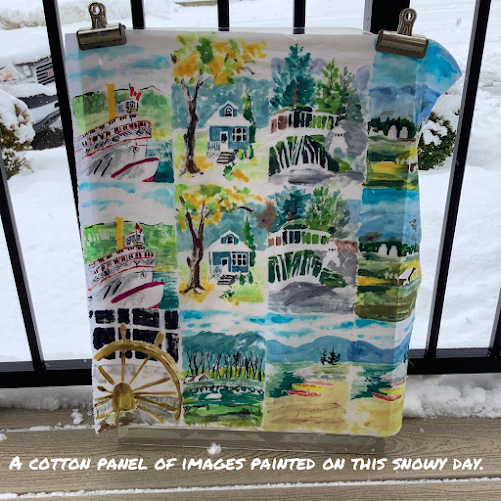
This panel was first painted lightly then soda-soaked once again and dried. Here I have lightly sketched in some 4 X 6" images (card size) in preparation for the second painting session.


What the same panel looks like two and half hours later. As I am painting with thickened dyes, the colours will be less vibrant once the panel is washed. 


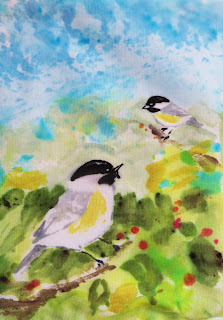
These chickadees, I am so in love with them even before the thread sketching. 


There was this one little piece of linen left at the end of a painting day and I used up all the little bits of mixed colours left-over to create this piece. A blue heron stitched in the right hand corner should look perfect. Linen, I must dye paint it more often!


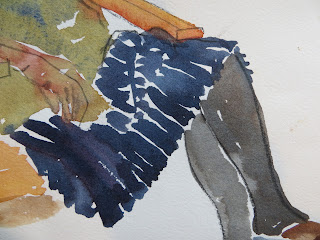
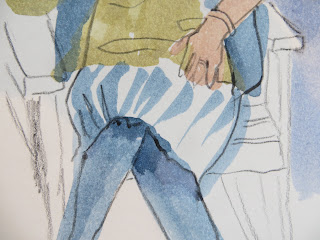
Watercolour painting.


This was from the first life drawing/painting session in 2022. The pleated skirt was so fun to paint.

THE FAILURE

This panel was painted in 2 x 3" images. Not very often do I veer from using the very best of fabrics for painting with dyes. Mercerized cotton from Dharma Trading is my favorite and is always reliable. However, I found this scrap of light canvas which I soda soaked and painted. Well there is three or so wasted hours as the dye did not make a good chemical bond with the fabric and much of it washed out. It was a very stiff canvas and must have a sizing on it that is not easily washed away. Grrr... Lesson learnt.


Thursday, January 20, 2022

January 2022 in the Studio


January is perfect for lots of painting time. Prepared fabric is being painted with thickened dyes to form a permanent bond once cured. 


A panel this size takes 3-4 hours to paint.

Sunday, November 14, 2021

Dyed velvet on Brooches

In late summer, when it looked like the local Christmas Art and Craft Market was going ahead this year, I made the decision to participate as a vendor. Some of you might recall that I was a vendor at Quilt markets in the past, mostly with larger pieces of hand (dye) painted cotton panels.  It had surprised me how much making this one decision to attend this Art Market has lead me in several new artistic directions.

The last few months have been a whirlwind of creativity and when an artist gets in the zone, it can be very exciting. Oh yes and sometimes exhausting, as one creative idea begets another. During this time I also started taking webinars to learn more about selling online. I am reminded of one webinar about online promotion when the instructor stated "Oh yes, you artists need to roll things out in stages as you generate a lot of ideas." It was relieving to hear I am not the only artist with this problem. Anyway, for this Market, I will be introducing textile art brooches featuring hand dyed velvet details and thread sketching for the first time.

'Warm Fuzzies' -bee brooches 

Aren't these cute, if I do say so myself? In person, you get to see the simmer of the yellow and gold velvet of the bees. The larger brooches are 2" x 3" and the smaller ones are 2" x 2"


The brooches attached to their packaging. The cattails turn out really well. It seemed important to have a variety to brown velvets for them. 


Backgrounds: With this second batch of floral brooches, I've began experimenting more with the backgrounds. Leaving them lighter so the velvet details show up. On two in the photo, I started with a plain canvas background and I like the way the thread sketching shows up on them. What do you think?


One can't go to a Christmas Market without taking some Christmas/winter cards so here are a few from the 'Outdoor Life in the Kootenay's' series. The thread sketched snowshoes are very popular, if time consuming. These cards are made to fit a mat or frame opening of 5 X 7" so they are easily framed and being original work they make a special gift in themselves. 


Reds and Greens: One always needs a few of those types of cards for customers. Did I mention also a new item I've been creating with my textile art is journals? Well that will have to wait for another post. Take care everyone!


Friday, April 3, 2020

Two days in an Artist's Life

Two days in an artist's world. Yesterday I was location sketching from the car as it was much too cold to be outside. Today I interpreted two of the tree sketches onto my hand-dye painted fabric using thread sketching. 


I was looking at the tree sketch on the upper right. When I was sewing, I kept moving the sketch right-side up to upside-down depending on which way I was stitching.

 This sketch was done very near where I live. It is one of two remining apricot trees from a very old orchard. There is an apricot tree in one yard and one in the next yard. They are very much appreciated in our neighbourhood as they are beautiful for their shape, blossom and apricot coloured fruit.

Fruit trees are pruned to have a spreading nature. The straight up new growth on top could use a little pruning. The size of the trunk gives us an idea as to it's age. I know some pear trees I painted in the same area were a century old. Looking forward to the blossoms next month!


Monday, July 22, 2019

July is a Good Month for Fabric Painting

Painting with Dyes on Cotton Fabric

Working in the heat of the summer is advantageous for the chemical reaction of the dyes with the soda soaked fabric. Warmth enhances the 'colour set' of the dyes. One thing you do have to think about though, especially if you are working on a large piece of fabric is to avoid letting the piece dry out. To minimize this, I work quickly, apply a generous amount of the thickened dye and lightly lay a piece of plastic over areas that I have completed. Moisture helps with the chemical reaction of the dyes and fabric so it is important for the dyes to remain a little damp overnight.


I always remember a hint about fabric painting from my friend Gail. When painting on the fabric, I will dip out a spoonful of the colour of thickened dye I want, onto a plate, along with any other colours I want to mix together. For instance, I might spoon out a dollop of yellow and a smaller amount of blue to mix together for green. Once I've finished painting with that colour, I might set it aside to use later in another area. Here is where the hint comes in. As my paint brush is going from the soda soaked fabric to the dye, the brush may carry soda ash back onto the dye plate. This soda ash will interact with the dye and start lessening it's colour strength. Therefore to limit this, I clean the mixing plates of the remaining dye often. Usually within every 2-3 hours or between finishing one piece of fabric and starting another. 


I share these ideas with you so that if you are ever painting with dyes, you are aware of them and thus have the greatest chance of success. It is mighty disappointing to rinse out a piece you've worked hard on and have it's colours be faded.

112 five by seven inch images

I've been working the last 2 weeks on these 112 images. With these small 5 X 7" pictures, I first drew the image in black dye using a bottle with a nib that I can squeeze out a small stream of black dye with. I took the extra step of rinsing the material after it had 'batched' overnight and then re-soda soaked the fabric. This was time consuming but it saved the chance of the black bleeding with the addition of coloured dyes and it allowed me to paint right over those black lines if I chose to because the black dye was set.

What beautiful gradation of colours hydrangeas have 

I admire the hydrangeas of my neighbour. Each image I painted has a reference to something in my life. I believe most artists work this way.

Border Collies and Black Labs painted with dyes on fabric
I've been painting a dog series in watercolour and so I tried painting some Border Collies and Black Labs onto fabric too.

Experimenting

The next two examples are over painting a low immersion dyed piece of fabric. Previously I had scrunched up a piece of fabric, placed it in a container, added some liquid dyes and poured warm soda ash solution over it. I am not really sure if over-painting on pre-dyed fabric, is going to be a success yet or not. When I start adding details in stitching, I will better be able to assess how this technique works. 
Note: some images are upside down and some sideways as I was working from both sides of the table.

Experimenting: Several small images on this one piece of fabric. 
 I think some of the pieces will require some additional fabrics to be stitched on top so as to show enough variance of values to see the images. It should be a fun challenge.
Experimenting: 12 small images that will be cut up for making textile cards

 More Experimenting

I had a little strip of cloth left over so I thought I would try some figures. In watercolour these are referred to as 'incidental' figures as they add interest to a painting but they are not detailed. I am looking forward to working on some larger textile pieces and these 'incidental' figures might just be what is needed in them.

My next step with all these small images will be to adhere them to heavy weight interfacing, cut them out and add free motion stitching details. They will then be attached to card stock for textile cards. I hope you are enjoying some creative time this summer.

Thursday, December 20, 2018

Textile Cards are for Christmas


Season's Greetings and Wishing You the Best in the New Year.
My hand made textile cards are available locally in Creston, BC at Creston Card and Stationery and the Cresteramics Art Store. As they fit perfectly into a 5 X 7" frame, they make a card and gift in one!


This was my favorite winter season card created this year. The hand dyed fabric with the soft mauves and little blue seemed so perfect for this winter skating on a frozen lake scene. When you are free motion stitching, you are never quite sure how stitched images are going to turn out because it is a little tight seeing beneath the sewing machine foot. I love the 'free spirited' look of the figure in this textile card. 


I started this piece about two years ago when I was teaching a Quilt Group a 'Painting on Fabric' workshop. Instead of completing it as a pot of poinsettias as it was originally intended to be (only the largest bloom was done), I just decided to paint an overall design of blooms. You can see below how some were cut to create cards. Boy was it hard to make the first cut into this fabric. 

This was the original hand painted textile that was reproduced for our Christmas Cards this year. Thank you Rook Designs of Creston, BC for the printing.

Soda soaked fabric painted with thickened dyes ready for 9 cards. Note below, the bunny I stitched on one of them. Do you have any other ideas for additional 'simple' images to be stitched on this dyed background? I think I have two left.


Textile cards for the winter season.

Monday, March 12, 2018

Creating Cards for Spring


Making Textile Cards

My Favorite for Spring
Looking for some new cards for spring? I have a new selection at Creston Card and Stationery, in Creston, BC. You can always contact me if you want something specific. 
Do you want to make some textile cards yourself? Below you will see the start of the process. Click here  or Click here for two other posts about the process of painting with dyes. 

Here the painted dye is wet. I am painting on soda ash soaked cotton which reacts with the dyes so their bond becomes permanent with the fabric.

Sometimes I put the thickened black dye in a bottle with a nib and draw the image first. You can see the bottle in the upper right corner of the photo below.

Oh the excitement of applying the thickened dye to fabric. I find it easiest to work on few card tops at once. That way if I am mixing the red dye I can apply it to several sections while I have some mixed up. You have to work fairly quickly as the setting of the dye relies on moisture so you don't want the fabric drying out. After the dye is applied I then put the fabric in between two pieces of plastic to cure 24-48 hours at 70 degrees F or above.

A length of fabric that has been rinsed, washed twice with Synthrapol which is a detergent that helps keep excess dye from moving to other areas and staining it. I like to iron the pieces dry. Mostly because I can't wait to see how they've turned out!

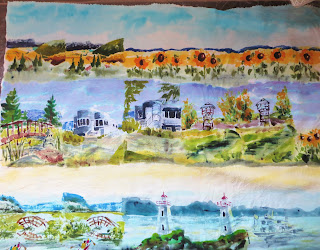
Another piece of cotton was painted with dyes in a way that may suggest landscapes. I like to use up the little bits of mixed dye colours that I have left over when painting the specific images such as in the photo above this one. Let your imagination run wild.

A window cut out of card stock can be used to choose the composition.

Heavy interfacing is ironed on the back of the fabric where I will be cutting the card top. I use 4" X 6".

Here is a sample of a length of cloth with the interfacing on, now ready for cutting out the card tops. Did you note that two of the corners are lacking an interfacing backing? They didn't make the grade and were culled out. On one the black dye bled into the yellow of the butterfly. This happened as I was too impatient to let the black cure overnight before adding the yellow dye. I managed to get away with it on the larger butterflies as I stayed away from the black line as much as possible. Reminder to self, plan to sketch out images with black dye and cure overnight!!!

This one turned out much better and with additional free motion stitching it should be a card that someone will like as it reminds them of spring. I was quite please with the sky in this one. It was a very light mix of blue, having a lot of the thickener (sodium alginate) in it. I sponged it on. It reminds me of those breezy days in May and June.

Friday, December 4, 2015

Vintage Sewing Machine: My Little Singer 'Spartan'

My Little Spartan

Have you ever dreamed of a owning a vintage sewing machine? Since I have been a vendor at shows, selling my hand painted and stitched fabrics, I've been thinking of having a hand crank sewing machine in my booth for doing demonstrations.  Last Friday I saw this machine at our local second hand store http://www.crestonvalleygleaners.com/ . This wonderful organization is run by volunteers and supports community programs. I thank the gentleman working that day who gave me additional information about this machine. After going online I find that yes it can be converted to a hand crank machine.


'Spartan 192' - Singer Sewing Machine
Yesterday, I cleaned and then oiled where I could see moving parts and the oil holes. The motor was working but the machine was very stiff to move. It wasn't until I cleaned and oiled around the bobbin area that the machine started moving smoothly. The spool spindle was missing but I tried sewing anyway.

 
It's first sewing in ??? years. I was able to hear another Spartan on a Utube video and my machine sounds the very same. It just purrs along. In one video they showed it sewing through multiple layers and then through 3 layers of garment leather. That's my little Spartan!


The Spartan is a specific model of the Singer Sewing Machine Company. It is 3/4 size and research suggests built in the 1950s or early 1960s. It is similar to the Model 99K but with much less decoration. Named the 'Spartan' as it was built as an economy model. But Spartans were also ancient Greeks from the City of Sparta so I already think of my little sewing machine as strong as Greek Warrior
Spartan 192 Model. This model features a forward and backward stitch.
Click here to go to an introductory video that I found helpful. And click here for an online manual. A couple of things I did learn online was that the silver area is NOT where the spool spindle threads in. It is an place to put oil. I read online that it is quite deep and should be cleaned first before oiling. I need to do that yet.

Another thing I learned was that red piece of fluff is an oil felt. DO NOT try and remove it. Thank goodness it didn't come out when I tugged on it. I left the tape on the machine bed for the photo. It delights me to think of the projects that must have been sewn by the previous owner.


The surprise this morning when I opened this somewhat hidden draw and emptied out the contents, I found the spool pin!!! Thank goodness I didn't find it before I did the research and try and put it in that wrong hole on the top.

A drawer that turns out from under the cabinet.
Odds and sods from the plastic bag inside the drawer. Well we know she/he sewed something light green, turquoise and burgundy.
Can you tell I am excited about my new sewing machine. I love it so much, the question is, "Will I really go ahead and convert it to hand crank?" Any feedback for others with vintage sewing machines?

Also this Week

The other fun thing this week was a Painting with Dyes workshop I gave to the local Quilt group. I didn't get as many photos as I should have but I'll post what I have soon. There were some great images painted and I can hardly imagine what the quilters are going to be sewing them into.
Sample piece of painting with dyes. We did a dry brush technique on the candle and greenery with a lighter dye glaze overtop. The two white stripes were created with a pinstripe masking tape resist for a design element that the quilter's are going to have fun embellishing with thread.